UPDATE: I think it is important that I inform readers that this guide is strictly for setting up and using L2TP. It has come to my attention that many of you are are looking for a L2TP/IPSec solution, which is currently not supported in PFSense as of the version I am using (2.0.1). I will update this post with full L2TP/IPSec instructions once this functionality has been added in new versions of PFSense.
I’ve been toying around with setting up a home VPN for about a week or so now, which has progressively improved. At first, I had a working VPN implementation with PPTP and life was good. But apparently PPTP is known to be less secure than other methods. So that got me thinking about beefing up my security. Here’s a quick summary I found.
PPTP has been the subject of many security analyses and serious security vulnerabilities have been found in the protocol. The known vulnerabilities relate to the underlying PPP authentication protocols used, the design of the MPPE protocol as well as the integration between MPPE and PPP authentication for session key establishment.
After discovering this information I decided to poke around for a little bit to decide what would work the best for me. There were pretty much two options when it came down to setting up my VPN server the way I wanted it. L2TP and OpenVPN. They are both considered secure and from what I’ve read OpenVPN is considered slightly better. The reason I chose L2TP is becuase it is built in to the VPN client on pretty much every OS these days, making client set up and configuration fairly quick and painless (I’m sure its not difficult to set up and use OpenVPN either but I didn’t get that far, maybe I will experiment with it in the future).
There isn’t really all that much to getting things up and going. Open up the pfSense management interface and navigate to the L2TP VPN settings. VPN -> L2TP
Next, we have to configure our settings.
- Server address – Use an ip address that doesn’t fall into the subnet that the VPN clients connect to. I used my external IP address to make things easier.
- Remote address range – This will be the subnet that VPN clients connect to. I am using the 192.168.2.0/24 subnet.
- Subnet mask – I am using the entire subnet so I chose /24.
- Number of L2TP users – pretty self explanatory, I have 10 right now for testing purposes.
>I left everything else as the default initially. Here is what the configuration page looked like for me when I got everything working. Remember to change these values accordingly.
Next we need to throw up some user accounts.
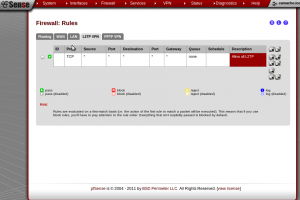
So far so good. Now we need to set up some traffic rules for our L2TP clients that connect. This is the absolute most basic method you can go with, so if you have restraints here you will need to adjust these settings.
The last and most important piece to get this working is setting up the firewall rules for the WAN interface. I got stuck at this part and didn’t realize there were two sets of ports that I needed to allow through for things to work correctly. Port 500 for Internet Key Exchange (IKE) UDP traffic and port 1701 for L2TP UDP traffic. Here’s what the rules look like.
That should be it. Try connecting to your VPN server with an endpoint client. I was testing this with my Android phone and had no problems after creating the two firewall rules. Happy VPNing!


